Hurricane Harvey’s journey through the Gulf Coast of Texas and Louisiana is a jolting reminder of the importance of preparing your home and family for the natural disasters that commonly occur in the Low Country this time of year through December 1.
The Savannah community has outstanding resources at both the state level and the local level to give guidance on preparing for hurricanes. Per the State of Georgia’s website http://ready.ga.gov/be-informed/hurricanes/ every resident needs to understand their risks and should plan what to do in the event of an evacuation. Specifically for your home.
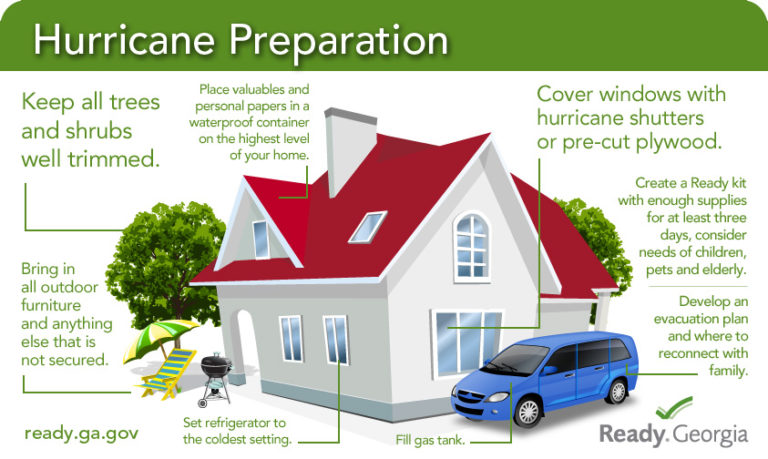
- Prepare to secure your property.
- Cover all of your home’s windows with hurricane shutters to protect them from high winds. Another option is to board up windows with 5/8” exterior grade or marine pre-cut plywood. Tape does not prevent windows from breaking.
- Plan to bring in all outdoor furniture, decorations, garbage cans and anything else that is not tied down.
- Keep all trees and shrubs well trimmed to make them more wind-resistent.
- Plan ahead for your pets. Shelters cannot accept pets due to health reasons, so it’s important to find a pet-friendly hotel or make arrangements with family or friends in advance.
- Know your area’s flood risk – if unsure, call your local emergency management agency or planning and zoning department, or visit www.floodsmart.gov.
- Property insurance does not typically cover flood damage. Talk to your insurance provider about your policy and consider if you need additional coverage. The National Flood Insurance Program is designed to provide reasonable flood insurance in exchange for the careful management of flood-prone areas by local communities. The program, administered by FEMA, is available in hundreds of participating Georgia communities.
FIVE GALLON EMERGENCY KIT CHECKLIST from Chatham Emergency Management Agency (CEMA)
Building your five gallon emergency kit can save you money and help you survive a disaster! It’s easy, but it can also be fun and educational if you include the whole family.

This kit can be used during a hurricane or other severe weather events by adding a few items.
Surviving a small or large scale disaster depends a lot on how prepared you are. You play a role in your safety and your family’s safety. An easy and very organized way to be prepared is to build an emergency kit. If you build your own it gives you a certain intimacy with your kit – you know exactly what’s in it and you know how to use it. Putting together your own kit means you can custom tailor what’s important to you, your family and your community. For example, if a family member has allergies, some that can kill very quickly, an EpiPen may be a critically important supply.
Just remember to put a date on your kit so you will know when you assembled it and can check expiration dates for certain items. A good emergency kit can easily last five years or more, but not everything inside will be good for that long and may need to be periodically replaced. Again, the EpiPen example -they only last about 20 months from the day they are made. Replacing an expired EpiPen could be a life or death matter!
A kit should always be tailored to what’s likely to happen in your area and your family’s needs. Every item should be listed in detail on a printed contents document. On the back, list important phone numbers such as relatives, insurance companies, police, fire, etc. Remember, store water and non-perishable food for you and your pets separately.
ORGANIZING YOUR KIT

Hygiene Supplies
- bar soap
- tissues
- floss
- baby shampoo
- hand lotion
- sunscreen
- toothpaste
- toothbrushes
- feminine hygiene pads
- comb
- toilet paper
- wash cloths
First Aid Supplies
- basic first-aid guide
- moist towelettes
- antiseptic towelettes
- latex gloves
- acetaminophen (Tylenol)
- ibuprofen (Advil)
- aspirin
- diphenhydramine (Benadryl)
- loperamide (ImodiumA-D)
- burn cream
- sting relief towelettes
- hydrocortisone cream
- triple antibiotic ointment (Neosporin)
- cough drops
- earplugs
- instant ice pack
- tweezers
- nail clippers
- scissors
- digital thermometer
- cotton balls
- waterproof adhesive
- gauze rolls
- gauze pads
- moleskin
- band-aids
- butterfly bandages
- ace bandage
- triangular bandage
Pet Supplies
- collar
- leash
- medical and vaccination
- records
- extra food and water
General Supplies
- glow sticks (12 hrs)
- flashlight
- liquid candle
- matches
- mylar blankets
- hand warmers
- AM/FM radio
- whistle and lanyard
- sewing kit
- blank notebook
- pencils
- batteries (for flashlight and radio)
- zip ties
- P-38 can opener
- trash bags
- N95 dust masks
- duct tape
- small tarp
- paracord
- safety goggles
- work gloves
Food and Water
- It may be beneficial to store food with your emergency kit so that if you need to evacuate, or you need to shelter in place, you will have food to sustain you and your family.
- If you do not regularly eat canned chicken or freeze dried ice cream, don’t put it in your emergency kit. Try to include non-perishable foods that you and your family eat on a regular basis. Trying to introduce your children to new foods in the middle of an already stressful event may be difficult.
WHERE TO KEEP YOUR KIT
When determining the best place to store your emergency kit, keep in mind that you will need your kit handy during an emergency. If there were or tornado warning in your area and you needed to seek shelter immediately, you would want your emergency kit nearby. Therefore, storing your kit in a closet or interior room may be ideal! This would also allow the materials inside the kit to remain in a temperature controlled environment.
Regardless of where you store your kit, just ensure that you and your family know exactly where it is stored and what’s inside of it so that anyone can access it during an emergency.